I have started using this tiny binder as a mini creative ideas journal. I am loving the process of being able to create on pages that I can take in and out. Even though I have a few more journals that I am using, for different reasons ( I can't seem to stick to one) I find each one brings me different inspiration.
This little journal is growing quickly and maybe, just maybe, I will do something to make the cover my own. But I do love the llamas! This is part 2 of my process, and I may keep filming more.
I really love how this cute little mini came out. I had so much fun putting it together and I hope you enjoy making one yourself.
I did have inspiration to make a mini because I wanted to use the cute valentine themed ephemera from @simplestories that I had and it goes so well with my valentine papers!!
I also wanted to feature that cute rosette that I made from the latest @cocoandreno kit, these are so fun to put together.
Today I am sharing a review and unboxing of washi tape and washi tape stickers from The Washi Tape Shop. I was so inspired by the designs and the lovely items that I got to play with.
First I noticed the packaging was great, not overly packaged!! It is the first time that I was able to play with the flower petal Washi's and I LOVED how it comes out!! So versatile.
The washi tape stickers are great!! They come in a roll and you can use what you want, when you want it! They have a backing to them so they don't get stuck until you pull them off their paper backing! Love it!
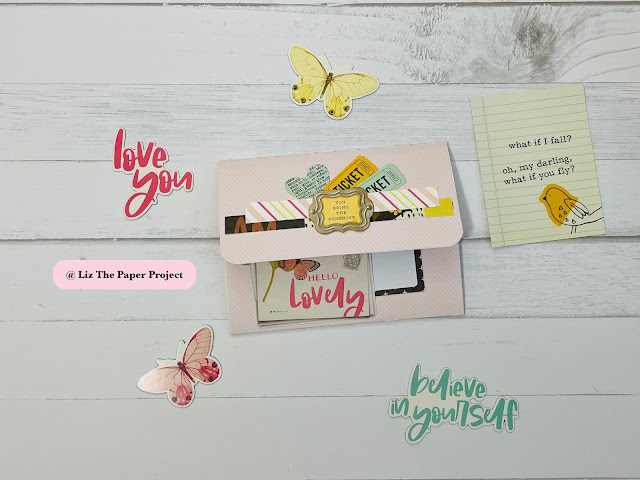
Today I am going to show you how I made this super fun and easy ephemera holder / mini album. For the base we will be using one 12'x12" scrapbook paper and as always, grab your scraps and any embellishments you want to add to it. I also show you an alternative way you can add much more pockets and tuck spots to this project - watch to the end of the video to see more ideas. I also have used some embellishments from some #simplestories collections to make this project stand out! As well, I also used some pages from my latest kit, Hugs XO - you will find my shop details by clicking My Shop tab. :-)
I really enjoyed making this with so many areas to add ephemera. So fun for the recipient to find all the goodies you've hidden inside.
It's a little deceiving, not knowing how much is actually in there!
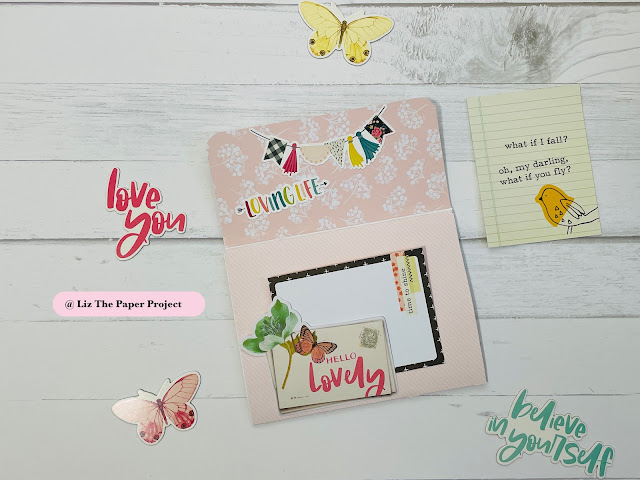
I think my fave part was adding all the areas to flip out and discover!
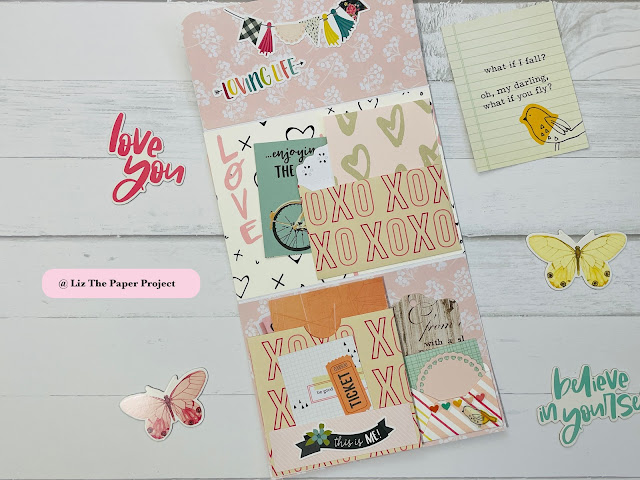
Just when you think you are done, you flip it over and discover more!!
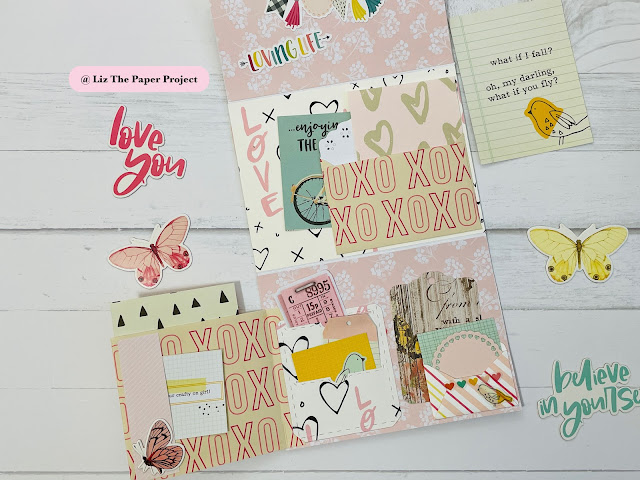
The more you look, the more you find!
So in the video, I also show you some additional ways to add more pockets, tuck spots and even an accordion area with pockets! Take a look. Let me know which one you are going to make! Video link below.
I have another Stationery Pal Haul, loving all the goodies! I am hoping to make a few more videos showing how I am using some of the supplies, specially in my journaling. So many new goodies to play with.
Here is a list of some of the goodies I shared in the video. Loving how the black sticky notes make the posca markers pop! Such lovely colours and great for anyone that does mixed media.
I had so much fun making this super easy and fun project. It is so versatile and you can make it any theme! I wanted to go with a valentine feel. That is why I also used my new printable kit, HUGS XO, and my Mini Snail Mail Ephemera kit to add a little extra to this project. I hope you enjoy making one also. Check out my shop tab to get my kit!!
The printables I used:
Mini Happy Mail Ephemera Kit: https://lizthepaperproject.company.site/Mini-Happy-Mail-Ephemera-Set-Digital-Download-Printable-Paper-p387052101
Hugs XO Kit: https://lizthepaperproject.company.site/Hugs-XO-Digital-Download-Printable-p430238511
Today I will be showing you how to make this cute little ephemera holder / album. I saw this and was inspired by another creator. I LOVE it so much!
Enjoyed this video? By purchasing a printable in my shop you are supporting my channel so I can keep sharing more ideas with all of you, Thank you!!! Thank you so much for your support!!!
Check out my coupons tab for links to the shops I mentioned.
Digital Collage Club
Lifetime Membership:
https://digitalcollageclub.com/lifetime-membership-secret-sale
get $10 off with coupon code: lizdecor8Lifetime
For yearly membership go to:
https://digitalcollageclub.com/yearly-membership-secret-sale/
get $5 off with coupon code: lizdecorYearly
Join Canva for free, use my link and get some freebies with me! https://www.canva.com/join/performing-lamppost-self
Stationery Pal website: https://stationerypal.com/?ref=lizthepaperproject
Use the coupon code: lizthepaperproject for 12% off your purchase.
Glue double sided adhesive I showed: https://stationerypal.com/products/plus-norino-double-sided-adhesive-glue-tape-6-mm-x-8-m-red?_pos=25&_sid=584ad8943&_ss=r&ref=lizthepaperproject
Thank you for visiting my blog and channel. If you enjoyed watching, it would mean so much to me if you click on “like” and subscribe to my channel, so I know this is what you enjoy watching. Thank you so much for your support! 🙏💕
BE NOTIFIED OF ALL NEW VIDEOS: Click on the notification bell beside the subscribe button! :-)
Here are the measurements for the tutorial:
Cover: 4" x 11" paper score at 3", 4 1/4", 7 1/4", 8 1/2"